White Ink File Setup
We are excited to offer white ink printing!
With the addition of our newest printing press we now have the capability to print white ink. To utilize this specialty service please refer to the file setup guide below. Please keep in mind that White Ink will not be visible on our White and Cream papers as well as lighter pastels, so choosing mid-tones and darker papers will produce the best results.
Please setup your files as described below:
Files must be set up with these exact specifications, or they will not print correctly!!
File Setup (for Adobe Illustrator or InDesign):
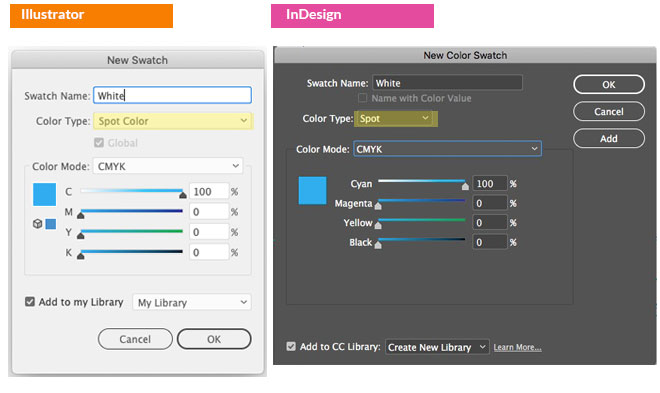
1. Create a Spot Color Swatch and title it “White” (Spelled EXACTLY with the first letter capitalized)
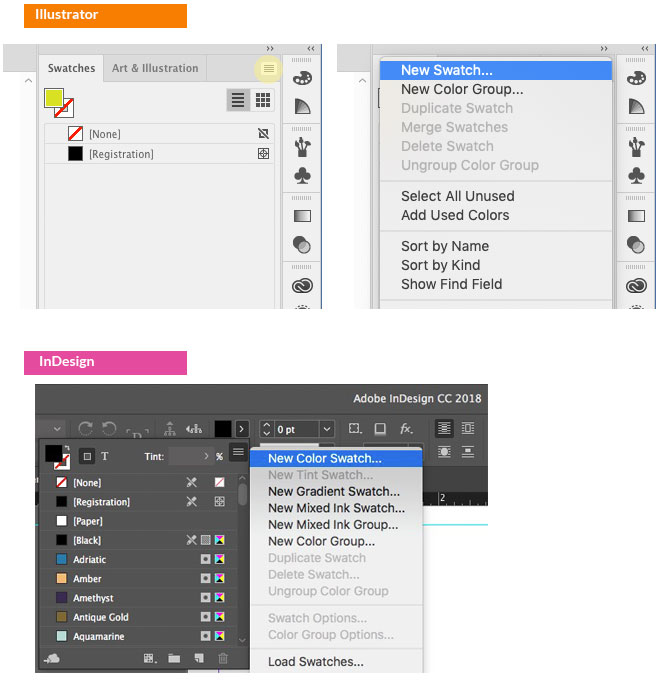
2. Give the Spot Color swatch the CMYK Code 100-0-0-0
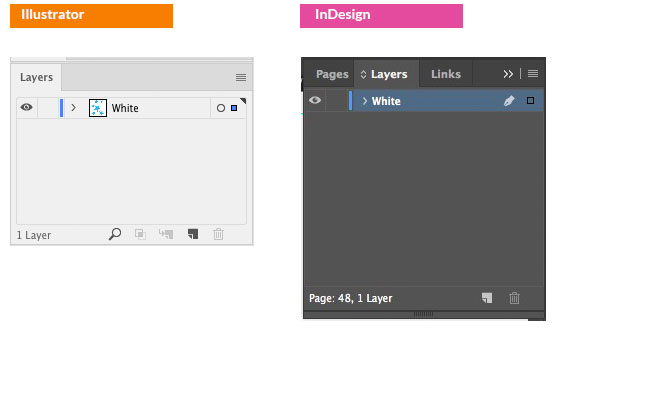
3. Make sure the layer that has all your content is also named “White” (Spelled EXACTLY with the first letter capitalized)
4. Make all your text and graphics (must be vector) use the color swatch you created (will look blue on the screen)
Any text or graphics that are not vector will not print correctly!!
5. Save File
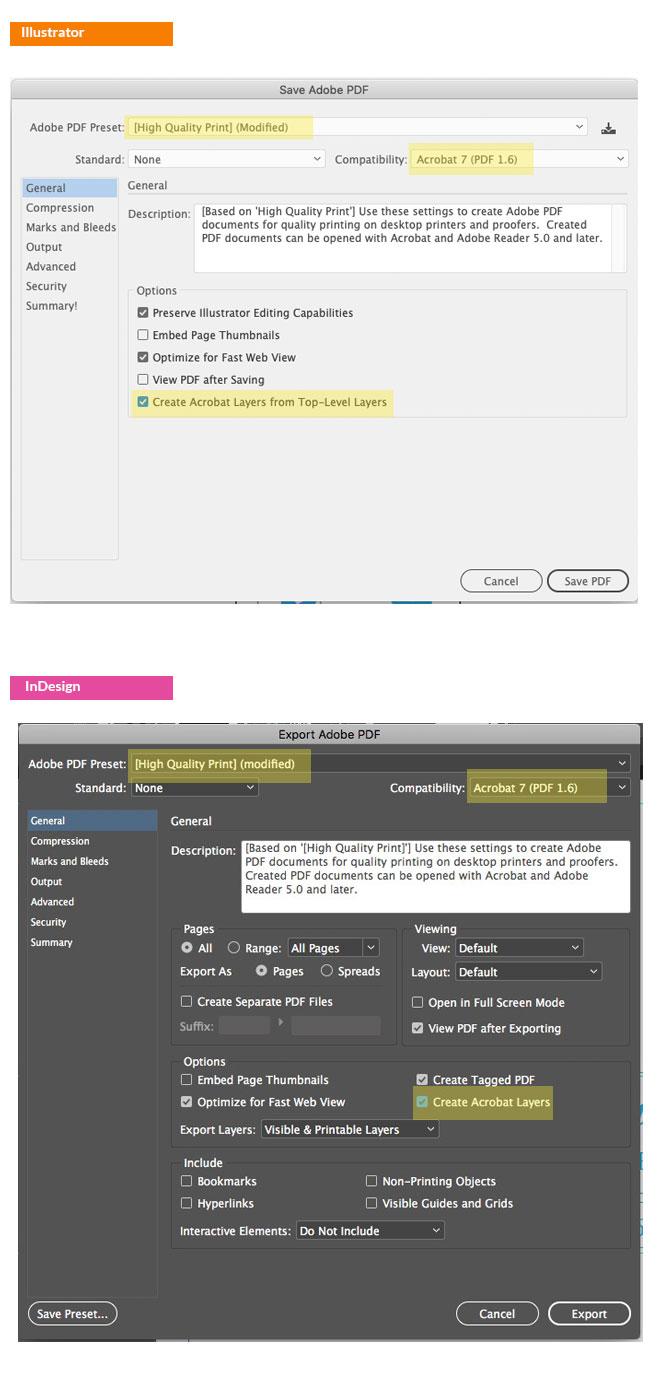
- FILE > “Save as” and select PDF as the file format (you can name it whatever you want):
- Adobe PDF Presets > High Quality Print
- Compatibility > and choose Acrobat 7
- On the bottom, check: Create Acrobat Layers from Top Level Layers
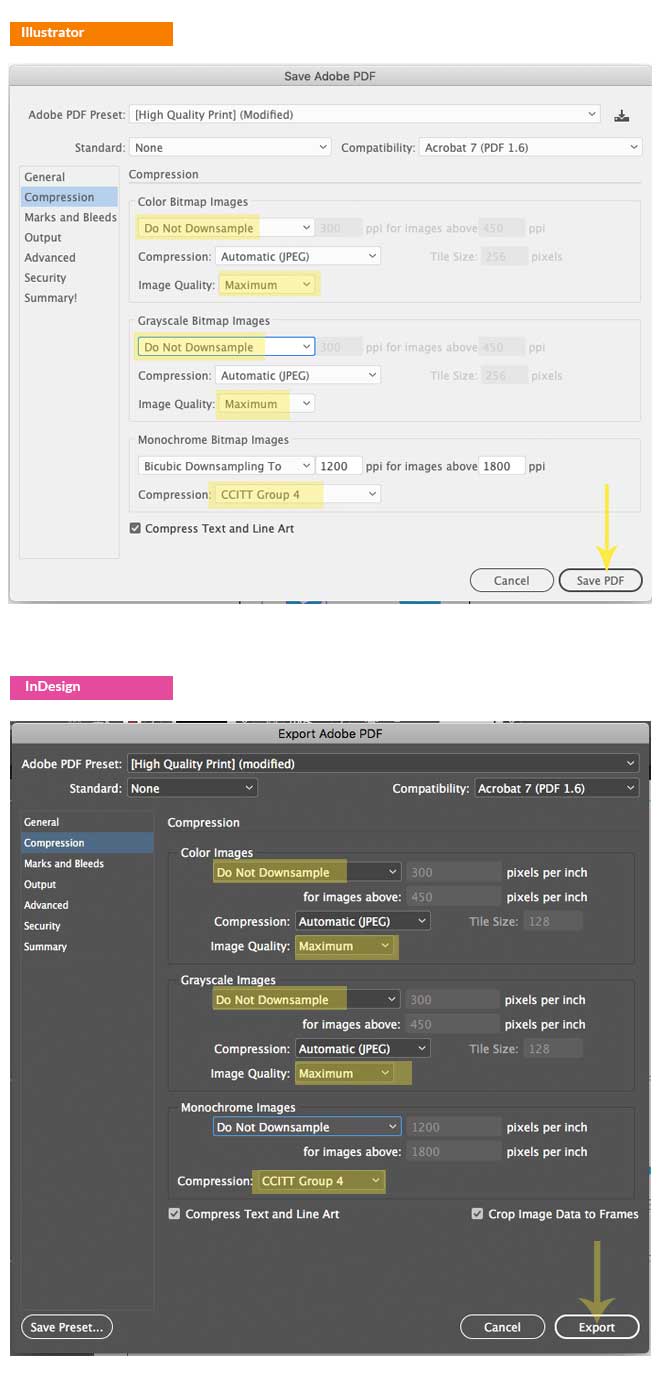
6. Select Compression
- Color Images > Do Not Downsample.
- Compression > JPEG, Image Quality > Maximum.
- Choose the same for Grayscale Images. For Monochrome Images > CCITT Group 4.
- Click “Save PDF”
Please let us know if you have any questions and we will be happy to walk you through this setup process.
